Sunday, August 17, 2014

Luscious Lemon Meringue Pie


Hello there my fellow lemon lovers,
So the past two weeks life has given me some lemons (or Costco) and you know when life gives you lemons you grab a zester and BAKE! I started out thinking about how lemonade is the epitome of a summer time refresher tangy and sweet all in one. Then it changed to lemons in general are summer in itself. So I went over to Costco bought a huge bag of lemons and dragged out the cookbooks. First thing that came to mind as I started into the books was pie, a Lemon Meringue pie to be specific. I had to make the hard life decision of either mini pies (in my mini pie maker) or a regular pie. I will not bore you with my long pro con list which includes my undying love for anything mini and tell you that I ended up with a regular pie.

            First step to any pie is the crust. The crust I made for this pie is a little bit different only in the way of rolling it out. So, you make just like any pie crust with the food processor throw it in the fridge for about 20 minutes while you gather up some more ingredients. I spent this time grating and juicing lemons, along with cracking and separating the egg yolks. Also crushing up graham crackers for the crust. After the 20 min has passed take out you crust and graham cracker crumbs. Instead of rolling out the piecrust onto flour you are going to roll it out on the graham cracker crumbs. Trust me this is better than any piecrust you can imagine. Once it is rolled out the size of your chosen pie dish, place it in there and give it a pretty edge. Also take a fork and poke the bottom a few times. Next take some aluminum foil and cover the whole crust. Now for pie weights I used some rice, but you can use marbles, beans, or actual pie weights whatever you have around. Put the piecrust in a 375-degree oven for about 25-30 minutes. After 25-30 minutes take the pie weights out, and keep it in the oven for 10 more minutes to make it nice and golden brown.

            While the piecrust is cooling grab a medium size skillet. Combine together the water, sugar, cornstarch, and salt. Bring those ingredients to a simmer whisking constantly. When the mixture starts to turn translucent add in the egg yolks two at a time, still whisking constantly. Lastly add in the lemon juice, zest, and butter. Remove the pan from the heat and pour the filling into the crust. Put a sheet of plastic wrap directly on to the filling, and refrigerate it for 2 hours.

            In the mean time take an hour nap or do some yoga. After that come back and get ready for some meringue time! If you read my Macaroon post you will have already done this. Now meringue is very temperamental and can turn into soup. First you need to start your sugar syrup by adding the sugar and water together in a pot. Turn it on high heat, put a candy thermometer, and leave it alone. Once the temperature reaches about 200 degrees, start you egg whites and cream of tartar. When the syrup reaches about 235 degrees, the egg whites should be at soft peaks. Slowly add the syrup into the whites. Whip the mixture until it has slightly cooled, and is shiny soft peaks.


            Grab you beautiful pie out of the fridge and your cooled meringue. Top the pie with the meringue and lightly smooth it over the whole pie. Then grab a spoon and add some cool texture with the back if you would like. Put the pie in a 400-degree oven for about 6 minutes until it is golden brown. 


Lastly cut yourself a big slice and ENJOY!


Later Lemon Lovers 
Cassidy 


Pie Dough
1 1/4 cup Flour
1 Tbsp Sugar
1/2 tsp salt
3 Tbsp shortening(chilled)
5 Tbsp Butter (Chilled)
4-6 Tbsp Ice Water

Filling
1 1/2 cups Cold Water
1 cup Sugar
1/4 cup cornstarch
1/8 tsp salt
6 egg yolks
1 Tbsp Lemon Zest
1/2 cup lemon juice
2 Tbsp unsalted Butter 

Meringue 
3/4 cup sugar
1/3 cup water
3 egg whites
1/2 tsp cream of tartar
1/4 tsp vanilla extract 

Monday, August 4, 2014

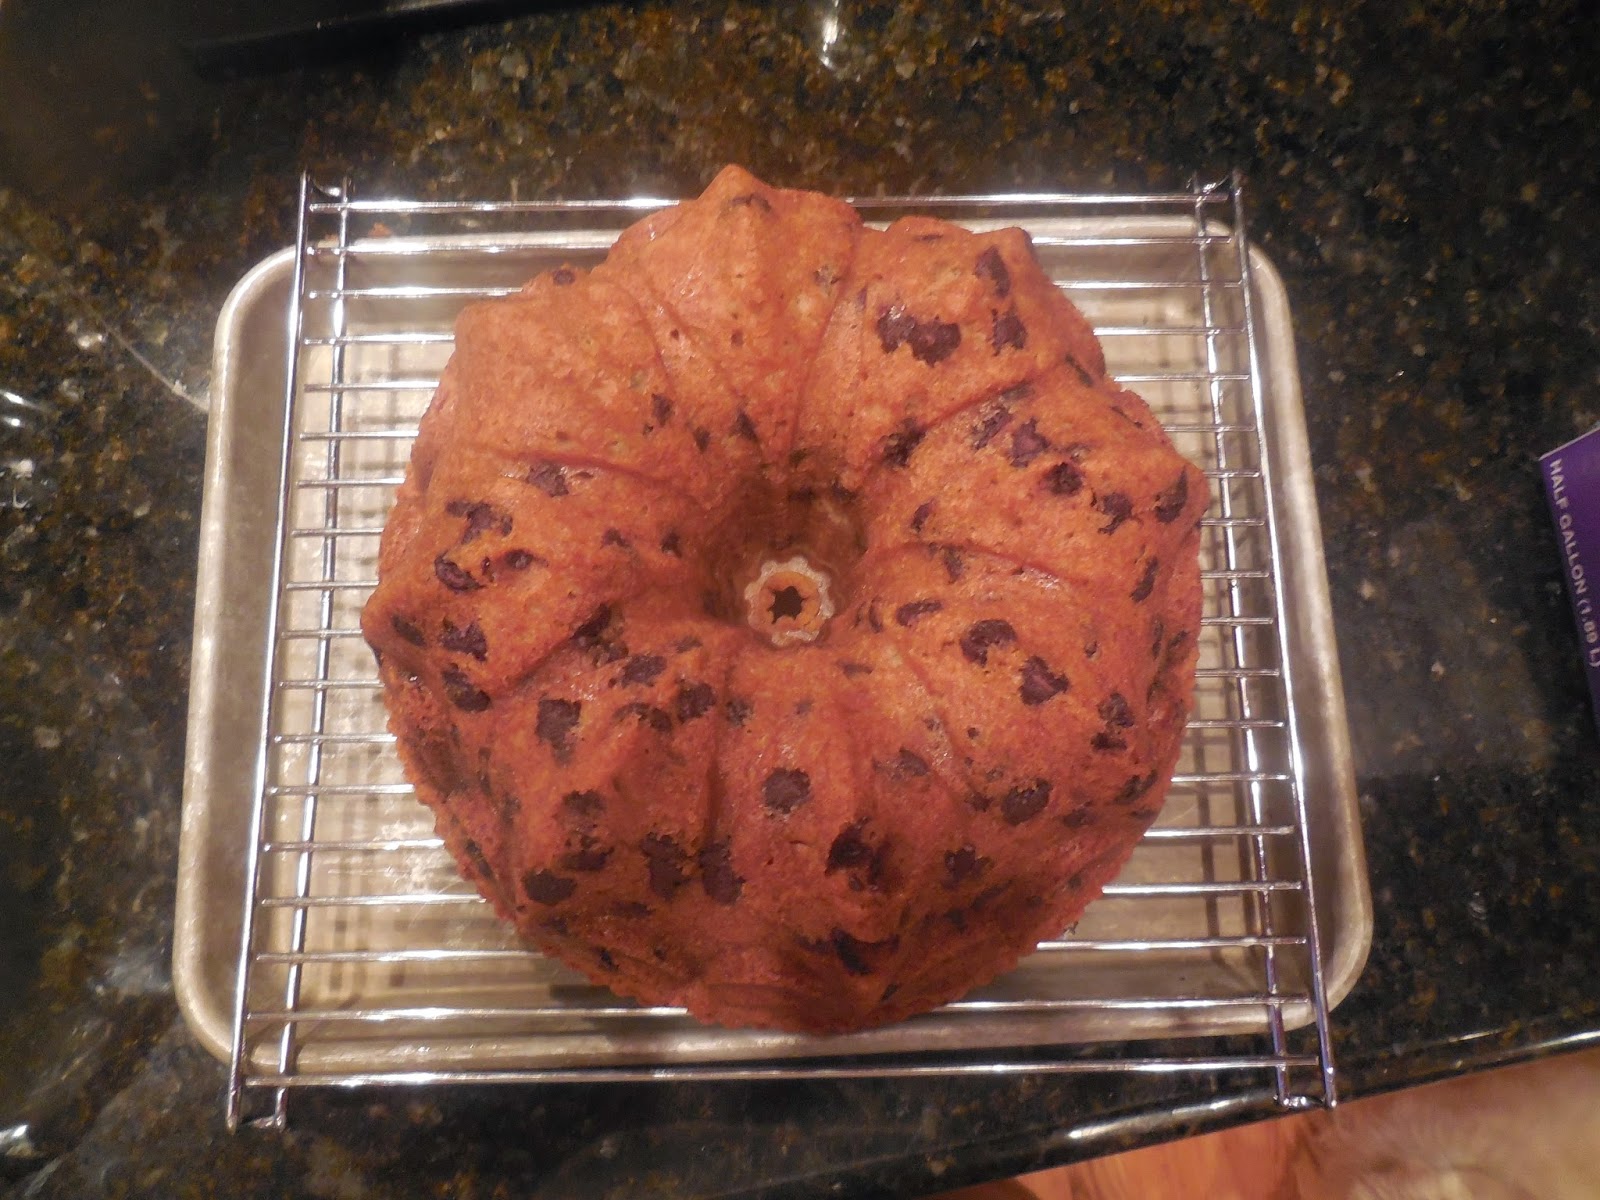
Easy Banana Chocolate Chip Cake


Good Evening (or morning?)
This summer has both been extremely long and relaxing, and at the same time short and hectic. Even with these conflicting feeling it has no doubt been hot, and hard to be in the kitchen. There is no doubt this is why most people tend to bake more in the fall/winter. When being next to the hot oven is cozy and comforting, instead of sweaty and irritating. The heat usually doesn’t affect me very easily, but when my weekly baking came around it really hit me (hard in the gut). There was a part of me (the part that usually wins) that told me not to do it, and nobody will know. This is why I frequently find myself in the middle of projects from 3 years ago(ask me about a hook rug) and frequently starting new endeavors. So as I thought about my starting record versus my finishing record I made myself keep going(Yay me!).
            I was recently studying abroad in Ireland, and of course had to bring home a little bit of the Irish baking. Which surprise was a cookbook to add to my collection? This is where I chose to make my hot summer day recipe. The recipe I chose was a one-bowl banana chocolate chip cake. That way I was in the hot kitchen as little time as possible, but still have a beautiful product to show you guys (who ever you might be).

            I won’t spend an unnecessary amount of words telling you which ingredients to put in first. It really does not matter. The only thing you need to do is measure everything correctly, and make sure your butter is nice and soft. Other than that you can just about dump all the ingredients in the mixer bowl, and mix it all up.


            Once it was a beautiful batter I poured it into a bunt pan, but you can use any pan you would like (get crazy). The times will vary depending upon your choice of pan. The oven temp should be ____, and if you used a bunt pan like I did it should take about an hour to bake.
            While that is in the oven I made an easy cream cheese icing. Which just has cream cheese, powdered sugar, and some milk. The more milk you add the thinner it will become. I made mine pretty thin for esthetic purposes over my bunt cake. You can put the icing on however you may desire, and you are done! YAY!


Sweet Dreams (literally)

Cassidy


3 1/2 cups All Purpose Flour
2 1/2 tsp Baking Powder
1/2 tsp Baking Soda
1/4 tsp salt
3 Bananas (mashed)
1 cup softened butter
1/4 cup cream
1 3/4 cup sugar
4 eggs
1 tsp vanilla extract
2 cups chocolate chips(optional) 

Saturday, July 26, 2014

Kauai Coconut Chewy Bars


Aloha!
The only trouble with living in the great state of Colorado is the lack of beaches and palm trees. I rarely have a moment where I wish I lived anywhere else, but once in a while I need some beach vibes. Unfortunately you need money to jet off to the beach whenever it calls (or sends a text) and I, like most college students or people in general, have barely enough money to buy grocery store sushi (don’t judge). So I enjoy bring the beach to me in my land locked mountain state. Hawaii being my main dreamy beach location, I brought in the typical Hawaiian ingredients coconut and macadamia nuts.
            Now the other factor to my weekly decision of what to make, was a shopping trip to TJ Maxx (where too many hours and dollars get spent). I went into the cooking section and found some really nice baking pans (if you’re a baking nerd you understand) I chose the brownie 8x8 pan as my prize. I took it home set it on the counter and stared longingly until I made the decision to make cookie bars. Nom nom!
            I kind of combined a couple of recipes from my Test Kitchen Baking cookbook. The ones I chose were the brown butter sugar cookies (which are a big hit with the McDuffee Clan) and the coconut chewy bars. Mostly by combined I mean I changed the regular butter to brown butter.


            Browning butter is the single most amazing small difference you can make in a recipe. It does however have a fine line between the perfect nuttiness and burnt (ouch). Browning the butter it the first step to this recipe. Take a good size saucepan and melt the butter over medium heat. Whisk is constantly until it comes to a boil. Then turn the heat up to med-high and whisk it occasionally to keep the bottom from burning. The butter will turn into a beautiful amber color and have a rich nutty smell. Take it off the heat and transfer it to a heat safe bowl. To that same bowl add the brown sugar, flour, and salt. Now it will be pretty wet since the butter has been melted. So I popped it into the fridge for 15 min. Once it has cooled grab your pan and line it with aluminum foil and give it a good spray then add the crust into the pan and flatten it out. Put it into the 325-degree oven for about 15 min.
            While that is baking measure out a cup of chocolate chips and set them aside. Once the crust comes out sprinkle the chocolate on top and let it sit for a minute while it melts. Then take a spatula and spread the chocolate evenly so you have a thin delectable chocolate layer. Next measure out your coconut and macadamia nuts, chop the nuts to your size preference and put them on a sheet tray in a 350-degree oven for about 10 min. Make sure to stir them around every couple of minutes to prevent burning (terrible smell). Now your kitchen should smell of the beach (or how I imagine it to smell).

            Now it is time for the best part of the bars, the toffee filling. Get a medium size bowl and whisk together the eggs, sugar, and vanilla. Next add in flour, baking powder, and salt it will begin to bubble a little bit (don’t freak!). Now take you delicious coconut and macadamia nuts (the ones you haven’t munched on) and stir them in. Take that whole mixture and pour it on top of the chocolate crust. And put it in a 325 degree oven for about 20-25 min. Once they are done let them cool for about 2 hours so they don’t fall apart.
            You can also add a little toasted coconut to the top if you are trying to impress people (which I am). These bars were a big hit with my family, they were gone within a day (which is not an unusual thing), but I did hear many yumms coming from the kitchen. They are the perfect dreaming of palm trees dessert.

Aloha!
Cassidy


Crust 
Browned Butter 8 Tbsp 
Brown Sugar 1/2 Cup 
salt 1/2 tsp 
All purpose Flour 1 cup

Semi Sweet Chocolate Chips 1 cup 

Filling
Eggs 2
Brown Sugar 1 cup 
Vanilla Extract 2 tsp 
All-Purpose Flour 2 Tbsp 
Baking Powder 1/2 tsp 
Salt 1/2 tsp 
Toasted Coconut 1 1/2 cups( + extra for munching and topping)
Chopped Macadamia Nuts 1 cup 

Sunday, July 13, 2014

Summer Very Berry Galette


A hoy hoy!
Summer time has arrived (or arrived a while ago I guess), and along with the heat comes bunches and bunches of delicious fruits especially BERRIES! Straw ones blue ones, raspy ones and goosey ones, every type imaginable. Now what do you guys think about pie in the summer? Is pie a thanksgiving/fall dessert? Sure if you fill it with pumpkin, apple, or pecans. However, there is a whole other world of pies out there filled with delicious berries waiting to be recognized above the fall pies. I personally feel these pies deserve more recognition (even though I love a good pumpkin pie) there is something about a berry pie that makes a long summer day worth the heat stroke.
            So my imaginary blog readers I have created this week a berry galette! Now what is a galette you ask (or don’t)? I suppose you could go look it up on Google and get a better answer than the one I am about to give you, but then you would have to change pages (please don’t). A galette I believe is a rustic type of pie, a pie without a pan basically. Created, like a good amount of baked goods, by the French. Who really cares who creates it though as long as it is delicious? This recipe was found in the daily paper I believe, in one of those little booklets. I actually find some of the best recipes in those booklets, so people do not toss them out the window.
            Now if you are like my mom and have had a life long battle with pie crusts, then I would go the safe road and just buy a Pillsbury pie crust (nobody will know I promise just be sure to shred the box). Homemade piecrust is not a hard thing, but everybody has his or her battles. This one in particular is easy, and delicious the only equipment you need is a food processor. A good trick to making crust is to keep all of your ingredients cold, to keep the butter flakes from melting straight into the dough and making it mealy. So measure all your ingredients, cut up your butter into cubes, and zest and juice your lemon. Add the lemon juice to ¼ cups of water and add some ice cubes while your waiting. Put the flour, salt, and lemon zest in the food processor and pulse it a couple times. When it is all mixed together, add in the cold butter and blend it until it looks like little peas. Then take your water and drizzle it into the mixture while the food processor is on. Let it go until it forms a ball, then turn it off and plop it on to a flours surface. Form it into a disc and wrap it in plastic wrap, keep it in the fridge for 30-60 min.


            While that is cooling, grab the berries that you haven’t already eaten. I used strawberries and blueberries, but if you don’t care too much for those then use any berries you like(I’ll never know). However, do make sure to cut strawberries into quarters. Mix together in good size bowl 2 Tbsp. flour, 2 Tbsp. sugar, and a little salt. Then take your choice of berries, and toss them in the mixture until they are all coated. Set those guys aside, and grab that dough from the fridge along with a rolling pin, and some flour.
            Now this is the worst part for my mom, and you may feel the same. Lightly flour the surface and plop that homemade dough on there (if you bought some just unroll it and your good to go). Roll out your dough into a circle about 12 inches diameter. Place it on the sheet tray with parchment or a mat. Grab your berry mixture and mound them in the center of the crust leaving about an inch or so on the edge. Then take the edge and start folding them up around the berries pleating it all the way around. If you want a little sparkle and pizazz you’re going to need a egg white, water, and some raw sugar. Whisk together a splash of water and egg white. Take a pastry brush and lightly brush the egg white all along the edges following a sprinkle of the sugar.


            Your oven should be preheated to 425 degrees. Place the galette in the oven for about 20-22 min until the crust is golden brown. As a finishing touch and to add to the pizazz factor along with the sugar we are going to need a glaze for the top of the fruit. Glazes are easy and usually for a fruit tart/pie/galette an apricot jam mixed with water and boiled is the best. Unfortunately I did not have apricot jam at this time, nor did I feel like driving to the store. So as a substitute I took some lemon juice and powdered sugar and boiled it. Then take a pastry brush and brush it over the fruit to keep the air from ruining the gorgeous fruit galette you have.
            The final touch to this is one of my favorite toppings to just about anything, a lemon curd whipped cream. It is easy and so amazing! You can buy lemon curd at just about any grocery store. Making it homemade is a little bit harder, but that it for another blog post (if you keep following). Just whip up some cream ad mix in some lemon curd and you have a little piece of heaven. I put this on almost everything my favorite is just a bowl of raspberries with this on top (OH MY GODDESS!) Throw that on top and eat up that galette!! Give everybody a piece of heaven. 


Love and kindness to all of you 
Cassidy :)


Crust
Juice and zest of 1 lemon
All purpose flour 1 1/3 cup 
Kosher Salt 1/2 tsp 
Unsalted butter 1 stick + 1 Tbsp

Filling 
All purpose flour 2 Tbsp
Granulated Sugar 2 Tbsp 
Strawberries 1 lb
Blueberries 1 cup

Whipped Cream 
Lemon Curd 1 jar 
Heavy Whipping Cream 1 1/2 cups